
Month: February 2013
Ombre watercolor quotation painting tutorial

Have you seen the feature on our home over on design mom? It was posted yesterday and it’s been such a treat to be featured over there. I love her blog and I have always been particularly fond of the living with kids series. It has been fun answering questions from her readers about where we got things in our home, and a few people have asked about the “home is wherever I’m with you” quote that we have in our bedroom.
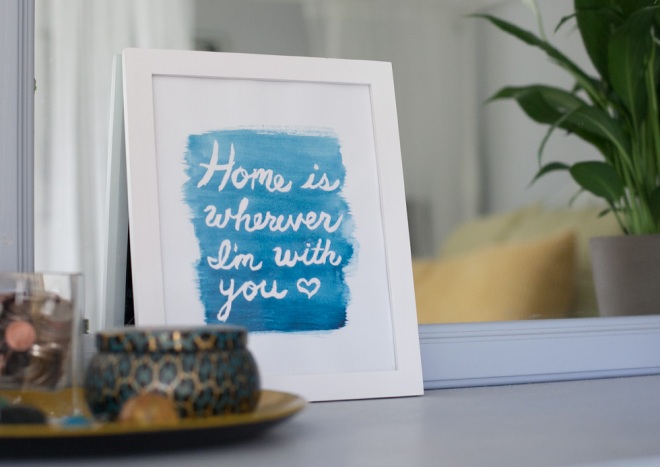
I’ve been a bit obsessed with watercolor lately, ever since Amelia started wanting to paint pictures of her own. It had been years since I painted and I had forgotten how fun and relaxing it can be. Once I had the idea for these song lyric quote paintings I just couldn’t seem to stop making them. I’ve been meaning to put together a tutorial on how I painted them, but really it’s SO simple all you need is a quick intro. Dear readers, I’d like you to meet masking fluid. It’s used in landscape painting for preserving small details, like a white cap on an ocean, but I have been using it to mask out words under a big swath of color.
All you need for this project is a few simple supplies.

I use tinted masking fluid, it makes it easier to see where you’ve painted and work on your design. I always freehand my designs, but I have had a lot of practice with hand lettering (I hand addressed each of our wedding invites in calligraphy, I’m a bit crazy sometimes). If you’re less sure of yourself you might like to sketch the placement of the letters very lightly with a pencil first. Make sure that you cover all of the pencil markings when you apply your masking fluid, as you won’t be able to erase them if they get covered in watercolor, and they might show through the paint. When applying the masking fluid, I always use a thin line as a first pass and then go back and add a bit of variation in line thickness to give a little more character. Once the masking fluid is entirely dry, go back with a wide brush and apply the watercolor. I am taken with ombre (it’s everywhere, isn’t it) so I’ve been painting gradients. I start at the end I want to be darkest (usually the bottom) and work my way up in side to side strokes, as you drag the brush upwards it naturally becomes lighter. Easy peasy.


Once the watercolor is all the way dry, just rub at the masking fluid with a fingertip and it should start to come right off. If you used pencil as a guide, you’ll want to use a clean eraser at this point to remove the markings. And that’s it, so simple! The hardest part for me is always waiting for the paint to dry to so I can see the finished product. I’m so impatient!

I actually have several paintings like this scattered throughout our house (did you spot them in the tour?) – the “E is for Edith” in her room was done with the same technique

Let me know if you try this out, I’d love to see what you come up with!
day 57 {pajamas}

Every room in our house has its turn at being filled with magical light. I love Paul and Amelia’s room in the morning.
day 56 {sisters}

Amelia got to pick a prize for getting her teeth cleaned at the dentist’s office. She chose a little pedicure set with a tiny heart shaped nail file and sparkly little toe separators. She didn’t really know what any of it was but she loved that it glittered (and was pink, naturally). Edith of course just had to climb up into a chair to play with the big girl toys.
day 55 {pruning}

We have a mystery tree in our backyard. The former owners told us (or at least we thought they did) that it was a citrus tree, but after over a year and a half of living in our house it still has yet to make a single bloom. Our teeny tiny lemon, orange and apple trees have all made fruit, and yet this gigantic tree has not made any. The one thing it has made lots of is new leaves. This thing is out of control, it’s probably twice the size that it was when we moved in and starting to look like an unruly beast, so we finally gave it a trim this weekend.
day 54 {chocolatier}
There are few things I love more than a good chocolate. Bad chocolate I can do without… but good chocolate? I’m such a sucker.
day 53 {color}

I can’t believe that my baby girl is growing up. That’s what they do, right? Grow up? I just wasn’t quite prepared for how much more quickly it was all going to go the second time around. I feel like Paul and Amelia were babies for ages, and here we are – 18, almost 19 months already. Sitting at the big kids table and coloring with friends. I need a pause button.
day 52 {blooms}

We brought these home from the store when they had only a few blooms. I didn’t know what they were but I loved the intersecting lines of the branches. The longer they sat the more they’ve bloomed and to say I was mystified was an understatement. I’ve since realized that they’re forsythia, and that this is what they do – you cut them in winter and bring them inside. The warm air and a vase full of water makes them explode in a sea of yellow flowers. It’s a magic trick if you ask me.
My favorite (and dairy-free) waffle recipe
 My kids are waffle fanatics. I personally prefer pancakes, but when you’re making breakfast for five it’s best to go with the crowd… and the crowd in our house adamantly cheers “WAFFLES!” at least once a week. I know that when most people think of waffles on a hectic weekday morning they think eggo – but I promise that these whip up in barely more time than it takes to toast a ready-made waffle, and they are infinitely more tasty!
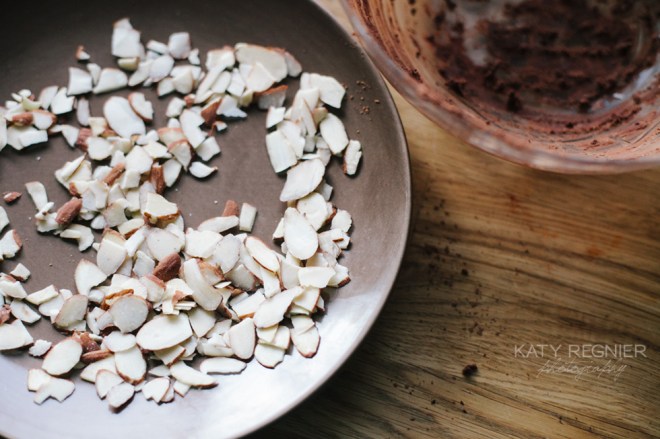
I originally found a variation of this waffle recipe on allrecipes and I used to make it just as written, but when Edith came along and was allergic to all dairy products I started looking for ways to make the foods that we love, but in a way that both I as a nursing mom to a baby with a dairy allergy and our food-loving kids could be happy with. The secret, as it turns out, is almond milk! Soy milk in recipes can make baked goods taste a bit, well, soyish but almond milk has very little in the way of distinct flavor, and it is nice and creamy which is delicious! My recipe also makes half as many waffles – as we would hardly ever eat a full batch of the original recipe, and my waffle snobs prefer fresh waffles to reheated (even though I think they’re great toasted the next day!)
If you know me at all you’ll know that I hate to get a bunch of dishes dirty unnecessarily while cooking – while I love to make things I definitely don’t love washing dishes – so I’ve devised a way of making my homemade batters with only one bowl and measuring implements. Most recipes will have you mix wet and dry ingredients separately, and it’s for good reason. The more that you mix up flour with liquid ingredients, the more that gluten is formed, which can make things dense and chewy – it’s the reason that every muffin recipe ever written implores you not to over-mix. To make a batter without over-mixing while still making sure that all of the rest of the dry ingredients are well incorporated, I’ve taken to modifying ever so slightly and mixing all of the wet ingredients thoroughly, then adding every dry ingredient but the flour, mixing well and then, at the last minute adding in the flour and giving one last stir. There is, of course, also still the issue of the leavening – in this case baking powder, which begins to be activated as soon as the liquid touches it – but I find in a recipe like waffles or pancakes where the whole thing start to finish is done in 5 minutes or less, it doesn’t make much difference.
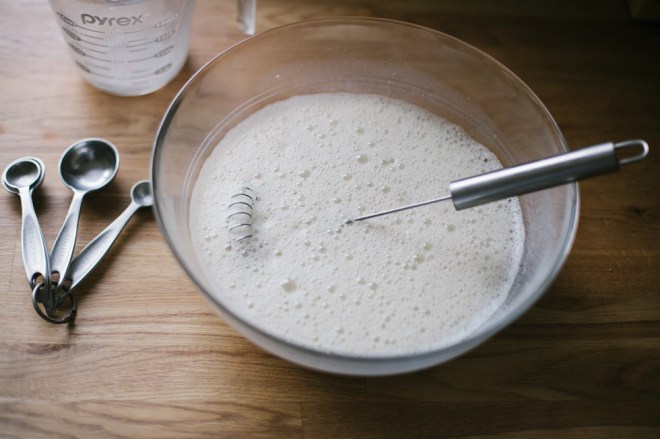 For me, the secret to the world’s fluffiest waffles is tons and tons of whisking. I whisk the liquid ingredients into a proper frenzy before adding the dry ingredients (except for the flour, don’t forget to wait on the flour!) then giving it another big whisking before adding the flour and giving one last stir.
 My batter is always crazy light and bubbly, but it makes some of the fluffiest waffles known to man!
 I’m providing two versions of this recipe today – and I liken the difference between them to the difference between a sinful nutella crepe and it’s slightly less decadent cousin the galette de sarrasin (buckwheat crepe). They’re both delicious and I personally would eat either one any day of the week – but some days you might feel just the tiniest bit guilty that your nutella crepe isn’t ticking all the nutritional check-boxes and long for something with ever so slightly more of a nod to health. In that case go for the wheat waffle with slightly less oil. I discovered that these waffles would still turn out with zero oil during a hectic morning when I omitted it entirely. In this version I add a little oil but not quite as much – it’s still delicious (especially with some jam like my kids eat them) but never quite *as* delicious in my opinion as the original waffle (topped with whipped cream, of course).

Sinfully delicious dairy-free waffles
Ingredients
- 1 egg
- 1/4 teaspoon vanilla extract
- 1 cup almond milk
- 1/4 cup vegetable oil
- 1 1/2 teaspoons white sugar
- 2 teaspoons baking powder
- 1/8 teaspoon salt
- 1 cup all-purpose flour
Directions
In a large bowl, whisk one egg until foamy. Add almond milk, vanilla and vegetable oil and whisk thoroughly again. Once mixed, add in sugar, baking powder and salt and whisk a third time. Once all dry ingredients are well incorporated, add in flour and mix until just combined. Pour into pre-heated waffle iron. Follow your waffle-maker’s directions for cook time. Mine are done right when the steam starts slowing noticeably from the sides of the waffle maker. Top with freshly whipped coconut cream and enjoy!
Tasty dairy-free wheat waffles
Ingredients
- 1 egg
- 1/4 teaspoon vanilla extract
- 1 cup almond milk
- 1/8 cup vegetable oil
- 1 1/2 teaspoons white sugar
- 2 teaspoons baking powder
- 1/8 teaspoon salt
- 1/2 cup all-purpose flour
- 1/2 cup whole-wheat flour
Directions
In a large bowl, whisk one egg until foamy. Add almond milk, vanilla and vegetable oil and whisk thoroughly again. Once mixed, add in sugar, baking powder and salt and whisk a third time. Once all dry ingredients are well incorporated, add in flours and mix until just combined. Pour into pre-heated waffle iron. Follow your waffle-maker’s directions for cook time. Mine are done right when the steam starts slowing noticeably from the sides of the waffle maker. Top with your favorite jam and enjoy!
day 51 {hugs}

There are always hugs at our dining room table. Always. Sometimes Paul hugs so much that he knocks his sister over. He has the biggest heart of anyone I’ve ever met.
