Light so buttery you can taste it – the magic hour

Light makes photography. Embrace light. Admire it. Love it. But above all, know light. Know it for all you are worth, and you will know the key to photography. –George Eastman

Learning photography is a tricky business – starting out it’s easy to believe that there are just a few simple rules to master to become an expert. In truth, the more that you learn the more that you realize that you’ve barely scratched the surface of what there was to learn. Such is the case with learning about light. I used to think that there were a few simple rules of thumb to using light in photography. I thought that with practice I would learn them all. And I have learned a trick or two in the last few years, but what I’ve learned more than anything is that light isn’t just a component of photography, light IS photography. Light lends the mood to an image, bends around objects and shows us the forms of our subjects. Light creates reflections and casts shadows. Light can be warm or cool, artificial or natural – but it always, always deserves consideration when shooting. I sat down to start a post about light and realized that it is impossible to sum up everything I want to say in one post, so instead I’m going to start a series. And what better way to start a series on light than to tell you about the first moment that I noticed the light around me as a photographer. It’s called the “magic hour” – some people call it the golden hour. It’s commonly defined as the last hour before sunset and I’m going to tell you a few things about shooting at this time of day.

Back in 2007 (before kids, can you imagine?!) my family and I were on a trip to Normandy and I was toting my camera everywhere with me. We were on a tour of historic WWII sites and happened to be at one of the old bunkers right around sunset. I was walking around snapping away when all of the sudden something MAGICAL started happening. The whole sky started to get a glow – a golden, shimmery, amazing, dreamy, buttery (there really aren’t enough adjectives to describe it) GLOW. The quality of light was so amazing that it literally felt like something you could reach out and touch. As I stood there, awestruck, it seemed that I couldn’t possibly take enough pictures to capture the feeling of being in that moment, bathed in that glow. The light was imparting an aura and emotion onto everything that it touched and it was literally begging me to push the shutter button (again, and again, and again). Still when I look at these images I can FEEL what it was like to stand in that light. It was the magic hour at its very best.

magic hour light explanation - Photography lessons on Permanent Riotmagic hour light explanation - Photography lessons on Permanent Riotmagic hour light explanation - Photography lessons on Permanent RiotAt this point in time I was what I would describe as an aspiring professional. I had set up a website to showcase my work, I was begging all friends and family to let me practice on them, and I was starting to shoot a few weddings. I had heard photographers talking about how light was important in photography and I knew the term magic hour, but I hadn’t ever really experienced it for myself. After seeing and feeling that light in Normandy I all of the sudden knew that light was way more important than I had ever imagined. I could feel its power and knew that learning to find it would make me a better photographer, but I didn’t know where to start.

I was told by more experienced photographers that the best way to capture the magic hour was to shoot during the last hour before sunset. In that hour you will find a magical, mystical warm glow. Or so I was told. So I scheduled an engagement session and pumped myself up. Let’s get ready for some MAGIC! And yet… what I got was this.

magic hour light explanation - Photography lessons on Permanent RiotSquinting? Harsh shadows? Raccoon eyes? This is not what I had in mind. The entire first half hour (maybe longer?) of our session looks like this. I’ll spare you the photos, they kind of make me cringe. At this point I was having a bit of an internal panic. What is going on?! I thought it was supposed to be the magic hour?! Why can’t I make any magic?

But then, slowly but surely the sun started to dip lower in the sky and a familiar warmth crept back in.
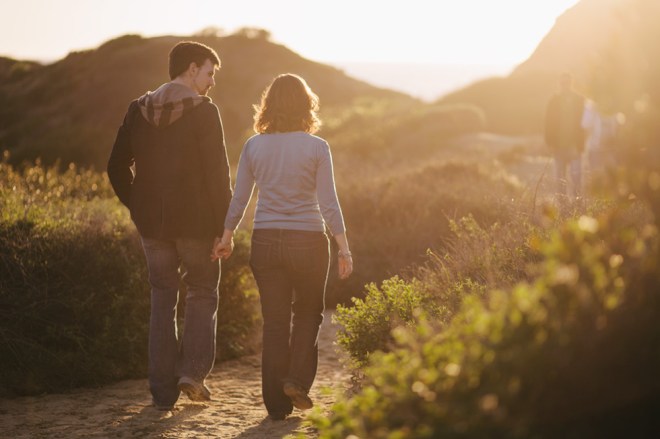
magic hour light explanation - Photography lessons on Permanent RiotIt turns out we had just started shooting too early, we were in midday harsh light territory and not the magic hour. If we were at a location with open shade this would have been a great place to start the session, but alas we were at the beach. Once the lighting was less harsh and more manageable things started falling into place a bit more. Keep in mind this is still very early in my photography journey, if I were here again there would be a few things I might do differently. Even so, what a difference between these and that first image.
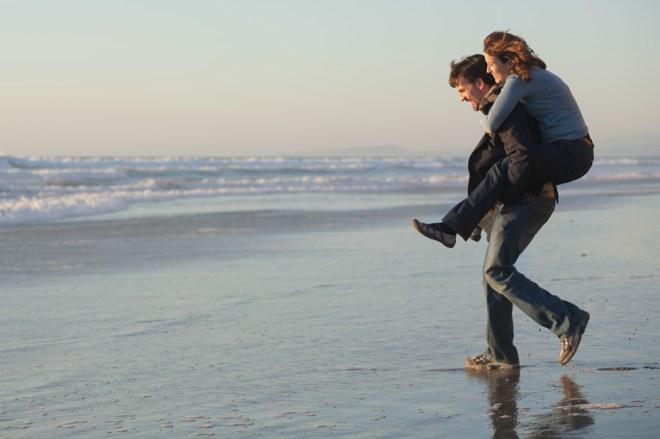
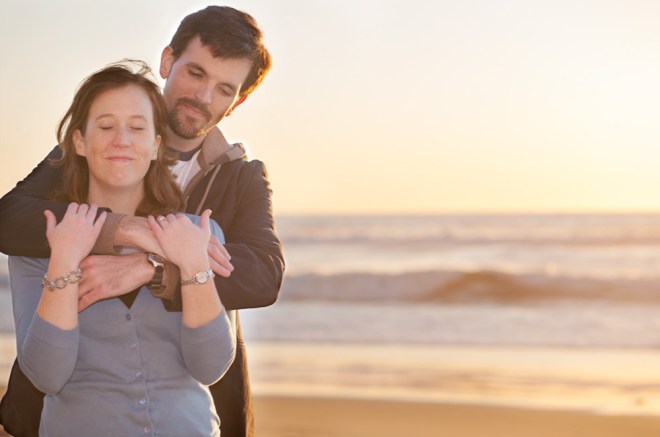
magic hour light explanation - Photography lessons on Permanent Riotmagic hour light explanation - Photography lessons on Permanent RiotSo why had all of those other photographers told me to start shooting the last hour before sunset if that last hour was so harsh? The real “magic hour” in my beach session was only about 5 minutes long immediately before the sun dipped below the horizon and the glow lasted a few minutes after the sun was gone as well. Does that mean you should only schedule shoots right at sunset with a little padding for lateness and “get to know you” time? Well not exactly. Here’s the part that took me a while to figure out. The magic hour really has very little to do with the clock. Light doesn’t care what time it is. Magic hour light comes from the interaction between light and objects. In the case of magic hour at the beach, the object is the horizon. But if you’re in a location with a hill, you’re going to lose light a lot earlier. If you’re in an urban location, the sun dipping below a building can give a magic hour glow. And both of those things are going to happen a lot earlier than if you were waiting for the sun to drop below the absolute horizon.

My yard backs up to a hill. The magic hour in my backyard is at least an hour (more like two depending on the time of year) before sunset. If I wait until the local sunset time to shoot in my yard I will be looking at a big blue blob of shadows. If I shoot at *my* magic hour I get something like this.

magic hour light explanation - Photography lessons on Permanent RiotThe effect in my yard at the very end of the day is so dramatic because the entire hill is in shadow while the glow creeps into the foreground. It’s an effect that changes by the minute and one that you can miss if you wait too long to shoot it.

Light filtered through trees will give a different look. The leaves appear to glow giving more brightness to the entire image compared to the darkness of the background in the previous image.

magic hour light explanation - Photography lessons on Permanent RiotAnd backlighting at the magic hour with the sun directly behind your subjects will result in an almost all white sky.

magic hour light explanation - Photography lessons on Permanent Riotmagic hour light explanation - Photography lessons on Permanent RiotBut the amazing thing about light in photography and learning to use it is that the possibilities are endless. The image directly above was shot with the sun behind the subjects and the sky is blown to white, but if you take a few steps to the side and shoot at the very same time of day from a different angle… well there is your sky again.

magic hour light explanation - Photography lessons on Permanent RiotThe way that you position yourself and the way that you set your camera will make all the difference in the world, and the beautiful thing is that the more you learn to see the way that light interacts with your lens, the more you can control it.

Sunlight hitting your lens directly will cause haze and lower contrast. Get that sun out of the same shot and the haze will disappear. The image on the left has a sliver of sun to the right side of the frame which is causing some haze and sun flare. Just a step to the right for me and a change in angle and the haze and flare are gone. Whether you prefer one or the other is totally up to you. It’s a stylistic choice but the important thing to realize is that it IS a choice. If you know how light works you can use it instead of having it use you.

magic hour light explanation - Photography lessons on Permanent RiotI tend to prefer backlit images to ones with front light. Even though the sun being low on the horizon gets rid of harsh under-eye shadows I still prefer the softer look of indirect lighting on faces and the bright airiness that comes with the light sky in a backlit image. If bright blue skies are more your style, don’t be afraid to shoot from an angle that sheds a lot of light on your subjects. The colors right before sunset are bright and vibrant with a delicious golden hue.

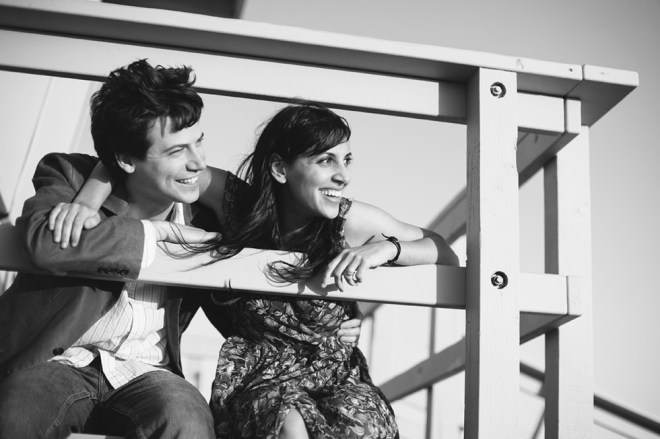
magic hour light explanation - Photography lessons on Permanent RiotThis kind of shot also translates well into black and white, since the higher level of contrast gives a nice depth of tones that might be absent in a backlit black and white.
magic hour light explanation - Photography lessons on Permanent Riot

If I let myself, I could just go on pulling images for this post indefinitely. Even though it’s one single time of day there are a million ways to use it, and I love the light at this time of day THAT much. But the crazy thing is that I have barely begun the journey in my own learning of what this light can do. I find myself discovering new ways to use it every time I shoot. Even though I have been practicing for years, I am just a novice when it comes to light. I hope that in writing a bit about how light moves and inspires me, that you will find some inspiration for your own journey. I hope that you will look at the world with fresh eyes and a bit of wonder at the amazing beauty that surrounds us, just waiting to be captured.

In the future I hope to share a bit about some of my other favorite types of light (I have a lot of them) and how I use them. In the meantime if you want to read any of my photography lessons you can find them right here. I hope you enjoy!

Advertisement
Light so buttery you can taste it – the magic hour

You don’t need the latest and greatest

One of the questions that I get asked most often is “what kind of camera should I buy?” It’s a question that makes me a bit uneasy because I believe that equipment purchases are highly personal decisions. I would hate to be responsible for someone else’s buyer’s remorse. I also know that people tend to think that they need the latest and greatest camera, when I would often urge them to go with something less expensive. It’s not that I don’t think that you deserve the best camera that money can buy (or that you can afford) – it’s just that I don’t think you *need* it.

My first introduction to photography was in high school and my camera at the time was a Canon A-1 (a film camera from the 80’s and close relative of the AE-1 which, by the way, had hilarious TV commercials which you can still see on youtube). It was by no means the latest and greatest camera but it did everything that I needed it to do. Fast forward to 2006 when I decided to learn digital photography. The camera I started out with was a Canon EOS 300D – aka the digital rebel – a camera made in 2003 which was the very first consumer DSLR on the market for under $1000 – this sucker was made almost entirely of plastic and rung in at $999 with a kit lens. I got mine as a hand-me-down from my dad who is always up on the latest in technology and had upgraded to a newer model. The original rebel now is practically a dinosaur. Compared to the newer versions of the digital rebel – even the very base level that Canon still lists on their site (the T3) the one that I was using had half the megapixels (6.5 vs. 12.2) and several stops less of ISO capability (1600 vs. 6400) not to mention all of the advancements in autofocus and sensor cleaning and all that jazz.

photography lessons on Permanent Riot by Katy Regnier photography

The thing is, none of that really mattered at all. It still had all of the basic functions that you need to learn photography – the ability to control aperture, shutter speed and ISO, and the ability to select your focus points. I ran my poor little rebel into the ground before finally upgrading to a 30D (also now a bit of a dinosaur) when I started shooting weddings. Eventually I upgraded again to a full frame 5D and most recently to the 5D Mark II. It’s easy to see a new camera come out and start to feel the itch – maybe I need it… maybe it would make me better… maybe it would make my pictures better. But the truth is that great imagery relies so much more on the photographer than the equipment. It’s not what you’ve got but how you use it.

Don’t believe me? I thought you might not so I did a little experiment and pulled out my old gear to shoot around the house this morning.

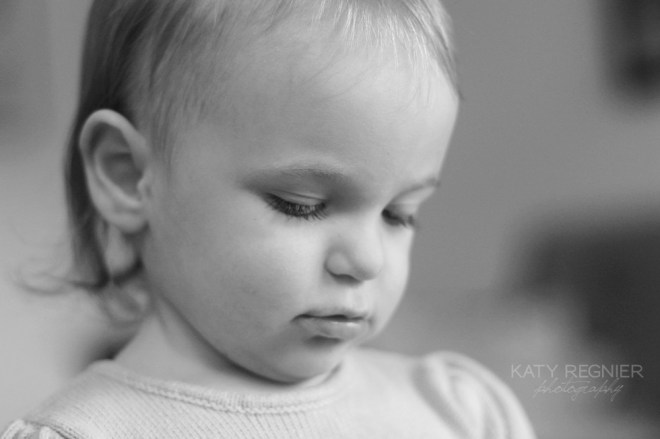
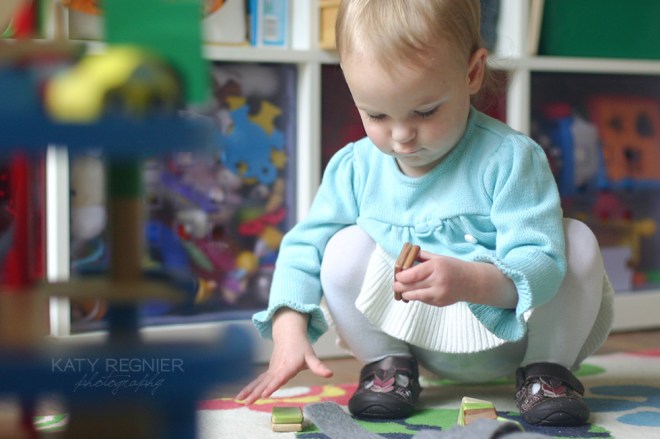
All of the images below were taken with available light using only my Canon EOS 300D and a 50mm 1.4 lens. I really wanted to take them with a 50mm 1.8 because that was my original prime, but sadly I have no idea where that lens is. I have a vague recollection of maybe lending it to a friend years ago, but I’m not sure where it ended up. Since I want to stay true to the message (it’s not the equipment, it’s the photographer) I took all of these images at f1.8 or higher. That means that you too – with even the most rudimentary of equipment – can learn to take photos like this WITHOUT spending a fortune on equipment. A used rebel just like the one I was using is currently going for around $80 on Amazon.

photography lessons on Permanent Riot by Katy Regnier photographyphotography lessons on Permanent Riot by Katy Regnier photographyphotography lessons on Permanent Riot by Katy Regnier photographyphotography lessons on Permanent Riot by Katy Regnier photography

So instead of focusing on what our cameras can’t do, let’s start focusing on what they can – and what they can do is give us the means to take beautiful photos of our lives and the ones we love. From the most basic entry level camera to the top of the line pro model, they all have one important feature in common. They are all operated by living, breathing human beings who bring their own visions of the world to the images they capture. What beautiful image will you capture today?

This post is the newest in a series of online photography lessons that I have written – most of them are several years old but I’m hoping to revive the series and start writing them more regularly again. To learn more about your camera and how it works check out more of the lessons right here.

You don’t need the latest and greatest

Crop frame cameras – why your field of view may not equal your focal length

Confused by the title? I thought you might be. Today I’m going to introduce you to the idea of digital sensor sizes and “crop” vs. “full frame” digital cameras. It may seem a bit complicated at first but there are really only a few things you need to know and take away from today’s lesson and I’ll be sure to point them out as we go along and give you a recap at the end as well.

Digital SLR cameras for the most part replace consumer 35mm film SLR cameras. They work in a very similar manner, but instead of a strip of film capturing the light, a little digital sensor does the job. You can even use many of the very same lenses you had for your old film SLR on your digital SLR. Where it gets tricky is that the sensors used are not all necessarily the same size as a 35mm film plane. So what you say? Well, what that means to you as the photographer is that your sensor is not capturing the entire image that your lens is seeing. In essence your smaller sensor is “cropping” your photo for you before it’s even taken. And to make it even more complicated, the “crop factor” depends on the particular camera you’re shooting, with most consumer Canon cameras having a factor of 1.6 and most Nikon cameras using 1.5. Nikon also refers to their full frame cameras as “fx” sensors and crops as “dx”… just to throw a little extra terminology into the mix.

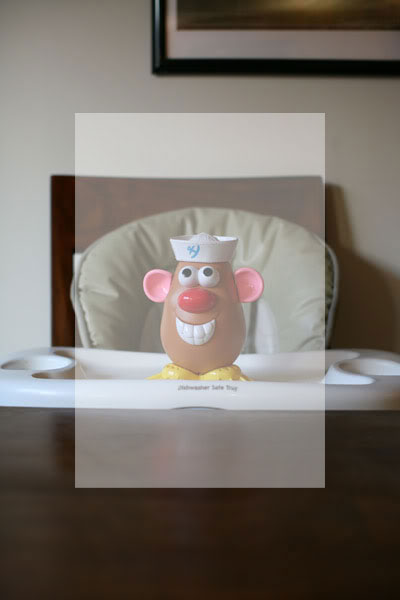
Still confused? Let’s try another angle (get the pun?) You just bought your very first Canon Rebel on the recommendation of all of your fellow photography enthusiasts. Those very same friends of yours encourage you to ditch the kit lens and go for the “thrify 50” – the 50mm 1.8 lens. It’s a great choice. Way to go. You slap that puppy onto your camera, look through the viewfinder, and WOAH… everything is super zoomed in, right? You can hardly shoot a picture of the person sitting across the dinner table from you without stepping a few feet backwards. You scratch your head, confused. “But I thought you said in your post on focal length that a 50mm lens replicated the angle of view of the human eye, this doesn’t seem right”. Well good for you for remembering that little nugget of information. And you’re right. So why do things seem so close through the viewfinder of your camera? Blame it on the field of view crop factor. Your camera’s sensor only captures around 62% of the image that the very same lens would capture on a full frame camera. This idea is usually shown by a set of concentric rectangles, the outermost one representing the “full frame” shot and the inner ones representing the crop. Let’s take a look, shall we?

The full image is what would have been captured with either a 35mm film camera or a full frame digital camera, in this case a 5d. The image was shot with a 50mm lens. The grayed out portion of the image is 62.5% of the image – or in other words approximately what would be captured with a crop frame camera. Big difference right? Now let’s see if this really pans out. Let’s take a look at the same shot (or as close to it as I could get to show you). I didn’t move myself or my lovely assistant (Mr. Potato) and only swapped the lens to another body, this time a crop frame sensor. Here’s the result.

Looks about the same as what’s in the box on the other image right? The framing is a little off, but this is just a demonstration and hey, I’m not perfect. You get the idea. So where does the 62% come from and what’s with the 1.5 or 1.6 crop? What do those numbers mean? Well someone out there came up with the idea of calling the sensor by the “field of view crop factor”, that is the value by which your “field of view” is multiplied when you use one of these sensors (I know, I know we’re getting complicated again).

Let me try to break it down. For the purpose of this explanation we’re going to pretend that “field of view” is the same thing as focal length… it’s not really but let’s just say it is. So you have your 50mm lens – that number, 50 is your focal length or field of view. And on a 1.6 crop sensor you need to multiply that number (50) by 1.6 to get the “effective” field of view (or focal length) of your lens. That is, what the focal length will appear to be. So your 50mm lens, times 1.6 crop, will have an effective focal length (or field of view more accurately) of 80mm. So basically, in essence, that 50mm lens you thought you bought is acting on your camera more like an 80mm lens, which is decidedly a telephoto length.

To explain it more in pictures here are a few more direct comparisons between the full and crop frame cameras. Here is a 28mm lens on a full frame

and on a crop frame. Note here that a 28mm on a 1.6 crop camera will give an effective field of view of 44.8, which is much closer to that 50 you were looking for in the first place. You can see that it is indeed a similar shot to the one taken with the 50mm on the full frame.

and just in case you need to see it one more time, here it is with an 85mm lens. Full frame first.

and the crop frame

So what does this all mean to you, the crop frame camera owner? Well it means you need to think carefully before you purchase your lenses. Realize that lenses designated as “wide angle” for a full frame camera might actually be more middle of the road, and lenses like the 50 will be telephoto. This is good news if you are a lover of telephoto photography and background compression. Not so great news if you are a lover of wide angle, because as I’m sure you’ve realized, you’d have to go REALLY wide to get a lens that is wide on your camera. The good news is that there are a few lenses out there (one of my favorites is the Tamron 17-50mm 2.8, which is available for a variety of camera bodies) that are made specifically for crop frame cameras and that will allow you get the wide angle you crave. The downfall of these lenses is that if you ever decide to upgrade to full frame, the lens will not be able to be used on your new body. A small price to pay for the ability to shoot wide angle on your Rebel, wouldn’t you say?

Crop frame cameras – why your field of view may not equal your focal length

Quick Tip of the Day: see the world from a new point of view

One of the easiest ways to improve your photos is to change the angle you’re taking them from. Most peoples’ first reaction to seeing something they want to take a picture of is to just snap away from right where they were whenever they noticed the photo op. It will do you good to take a few seconds (assuming you have a few seconds to spare… if it’s a split second once in a lifetime photo op go ahead and shoot from where you are) and look around to see if there’s a better angle you could be shooting from.

I see a lot of photos of babies shot from about parent height a few feet away from the kids and just pointed down… does this look familiar?

The picture’s not bad. The focus is fine and the exposure is fine as well. It’s just not that great. The angle has caused the baseboard to run straight through the baby’s head. Not good. And it’s kind of boring.

My two favorite options for changing up angles are to either get really high or really low. When you’re shooting adults getting up above them usually means standing on something. Kids on the other hand are easy. All you have to do is get closer and angle your camera down more. This one is from higher up… but it’s still not close enough. The baseboard is still going right through his head.

But if we get EVEN closer and up higher…

Ahh… much better. Way more fun and interesting.

Getting down low is just as good. This shot is pretty much exactly the same as the first but from kid-level. In my experience it’s not enough just to sit on the ground, the real magic happens when you get down on your belly and really exaggerate the angle. I never wear a skirt if I’m out shooting because I know I’m guaranteed to be lying on the ground at some point 🙂

One more shot with the low angle… in this one I shifted the camera down as low as possible to get the bright colors in the foreground. Still in the same location, so much more interesting!

See what a little shift in your point of view can do? 🙂

Quick Tip of the Day: see the world from a new point of view

Sunshine 101 – the basics of shooting outdoors

I get asked a lot what the secrets are to shooting nice portraits outdoors. I’m not going to lie, great outdoor lighting is a little harder to master than great indoor lighting. The sun is a tricky light source and a powerful one at that, so it can be a little overwhelming trying to figure it out. There are a lot of ways to tackle outdoor lighting including reflectors, diffusers and fill flash, but for now let’s just stick with the basics. You, your subject, your camera, and a patch of shade.

If all you’ve got are the items listed above, there are going to be three basic options for shooting. You can either face your subject into the sun, face your subject away from the sun, or put them in the shade. Most people’s gut reaction is to face their subject into the sun. Light is good right? Well not so fast. Remember how I said that the sun was a tricky light source? That’s because it’s extremely bright and it’s coming from overhead, meaning that it casts harsh shadows and on people those shadows tend to fall below the nose and eyes, giving a lovely raccoon look. I tend to find that one of the major culprits of outdoor photos looking amateur and “snapshotty” are the strong shadows below the eyes and nose. Check out this example. Shot at ISO 100, f2.8 and shutter speed 1/2500.

photography lessons on Permanent Riot by Katy Regnier photography

Definitely not my favorite. Now turn the subject around in the EXACT same spot so that the sun is behind and I find this to be a much more appealing shot. Taken at ISO 100, f2.8 shutter speed 1/1000

photography lessons on Permanent Riot by Katy Regnier photography

You’ll notice there are a few of what we call “hotspots” in this photo, areas that are somewhat overexposed when compared to the rest of the image. There are parts of her leg and blanket that are very very bright. But I’ll take those little hotspots over the first image any day. Remember if we had more equipment (diffuser, reflector, etc) we could take care of these problems but we’re just sticking to basics here. You should also know that if the sky had been visible in this shot it would have been “blown out” to white. It gives a sort of high key look that some people hate… I just happen to love it 🙂

The third option when the sun just isn’t doing it for you is the shade. This is by far the safest option and a good fallback. This one was shot in the shade at the same location, ISO 100, f2.8 and shutter speed 1/320

photography lessons on Permanent Riot by Katy Regnier photography

One part of shade shooting that most new photographers overlook is the quality of the shade. You want your subject to be out of the sun, but you also want for there to be natural light still hitting their faces. The best way to do this is to put the subject right at the edge of the shade, as close as possible to the sunlight without actually being in it. The difference in these next two is kind of subtle but to me it makes a big difference. The first is right at the edge of the shade, facing the direction of the sun. Notice they still have a bit of the sunkissed look even while being in the shade. ISO 100, f2.8, shutter speed 1/320

photography lessons on Permanent Riot by Katy Regnier photography

Even moving back a just a few feet will cause you to lose that “glow”. Same spot, just moved further into the shade. This time the shutter speed is 1/200

photography lessons on Permanent Riot by Katy Regnier photography

So there you go. Three different options for shooting in the sun, which you choose is up to you! One final warning note about shade shooting. While a park may seem like a great location for shooting portraits (lots of trees equals lots of shade right?) it’s actually hardly ever ideal. In my experience the shade from trees is almost always splotchy. Those little dots of light peeking through lead to what we call *dappled light* – great if you’re going to be painting a monet. Not so great if you’re shooting portraits. You’ll end up with those aforementioned “hotspots” right on your subject’s faces and nobody wants that.

Sunshine 101 – the basics of shooting outdoors

The one snag with high ISO shooting

Hopefully you have read the first couple of posts giving a brief overview into exposure and the three elements that you need to control (aperture, shutter speed and ISO) if you haven’t yet read those you might want to go back and start there or this one might not make much sense 🙂

If you did read those other entries you’re probably thinking this whole exposure issue is a snap. With three variables to play with surely there will always be a way to get enough light? Right? The trouble is each of those variables has limits. So far we’ve learned about the limits of aperture (that your lens only opens up so wide) and shutter speed (slow down too much and your kids will become blurry messes). Now I’d like to introduce you to the one catch about raising your ISO. When you’ve reached the limits of each of the other two variables you will probably be tempted to bump up your ISO (which if you remember makes your camera more sensitive to light). What you might not be expecting is the one ugly side effect of high ISO digital shooting….

Moms… I would like to introduce you to digital noise.

You’ve probably noticed it but not known what it was. You might have even thought it was a problem with your camera. Those pesky speckles of icky looking grainy color. Yes. That is the one snag with high ISO shooting. You can’t get something for nothing and the tradeoff with shooting at high ISO is that you may get noise. How much noise depends on your camera and also how good your exposure was. The good news is that the better exposed your image was to begin with the less noise it will have. Yet another incentive for you to learn proper exposure 🙂 Newer cameras (and more expensive ones unfortunately) tend to have better noise control. It’s something that has been improved steadily over the last few years and hopefully will only continue to get better. There are cameras out there that will allow you to shoot up to ISO 6400 and still have acceptable noise levels. Now THAT is impressive!

So what does this mean to you? Should you keep your ISO low? Well that depends on how much the noise bothers you and what your alternatives are. If there is no way to change your f-stop or shutter speed and you don’t have any other light sources available (we’ll get into flashes in another post) then I say go for it! I’ll take a noisy photo over no photo any day. I would even take a noisy photo over a direct flash photo. There is also no harm in trying the high ISO shot AND the flash shot and comparing when you get home to see which you like better. My other tried and true favorite trick to getting your high ISO shots to look nice is black and white! We haven’t even gotten into the land of “post processing” your images but when we get there black and white will be one of the biggest issues to talk about. Converting your noisy shots to black and white will make them look more like vintagey film grain pictures and less like an accident 🙂

Here are a couple of shots just to illustrate what exactly “noise” is. This shot was taken at ISO 800 so the noise isn’t too terribly noticeable but it is there if you know what to look for. 50mm lens, f 2.8, 1/100th

photography lessons on permanent riot by Katy Regnier photography

You can see in this crop of the original image that there is some color noise (the splotches of red and green) in the hair and the image overall is not as “smooth” as it would be normally

photography lessons on permanent riot by Katy Regnier photography

Even though the noise in this shot is not terrible I would still probably prefer it in black and white

photography lessons on permanent riot by Katy Regnier photography

Lesson of the day? Noise is just one more consideration when deciding what settings to choose to get your perfect image. Does it mean high ISO shooting is out? No. Should you know about it? Yes. As if you didn’t already have enough variables to think about 😉

On a side note I have a lot of ideas for new topics, but I want to make sure that I cover the things that YOU want to know about. If you have a request you can either leave me a comment here or email me at mwac101@gmail.com I can’t wait to hear from you!

The one snag with high ISO shooting

Quick Tip of the Day : windows are your friend!

I know a few of you have left me feedback saying that the posts are great and informative, but a little bit overwhelming. I am trying to make sure I cover the basics, but I don’t want to bombard you with EVERYTHING you need to know all at once. That’s why I’ve decided to break it up a bit and save the super long posts for another day. Today will just be the first of many “quick tips” for when you don’t have time to really dive into the details of how your camera works.

Today’s quick tip is on window lighting. Unless you live in a house without windows (and I don’t believe you do) there is at least one great spot in your home to take pictures of your kids. What you want is a window that lets in lots of great bright light, but that hopefully doesn’t have direct sunlight pouring through it. Direct light can be a little bit harsh and hard to work with. What we’re looking for right now is a window that “glows”. If you have a porch or overhang the window below it is probably a good bet. If there isn’t a couch or rug or even clear space in that room near to the window you might want to do a little rearranging so that there is 🙂

The idea is that directional light (from the side) is much more dynamic and interesting than light from straight on. Set your subject so that the light hits one side of their face and shoot away. It will bring out all of that cute baby chub and give your picture way more pop than if you had the light right in front of them. There are a million and one ways to use light and use it to your advantage. This is just one of the easiest. Go try it out at home!

This one was shot with my 85mm lens at f1.8 1/500th of a second.

photography lessons on Permanent Riot by Katy Regnier photography

Quick Tip of the Day : windows are your friend!

Zoom or Prime – an intro to focal length (and why you should care about it)

One of the questions I get asked most is what camera and what lens to buy. I don’t like telling people what they should or shouldn’t get because equipment choices are BIG decisions with a lot of pros and cons to weigh. I think that a lot of people get tripped up with all of the options. They don’t know what the different lenses are good for and they don’t know which ones they need. I can’t tell you what lenses you need. Only you can decide that. What I can do is try to give you a little bit of insight into what the differences are between lenses and help you try to understand which ones you might like best.

So lets start at the beginning. There are two main kinds of lenses. Prime lenses (also known as fixed focal length lenses) and zoom lenses. Your camera kit lens was probably a zoom and probably had a range of somewhere around 18-55. That’s pretty standard. A focal length of around 50mm is said to be the most similar to the way that our eyes perceive the world. Anything from 21mm-35mm is commonly known as “wide angle”, anything from 35mm-70mm is said to be “normal”, and from 70-135 is “telephoto”. A lot of kit lenses try to give you everything in one lens, all the way from wide angle to telephoto. The drawback to these lenses is often that they suffer in their aperture capabilities, opening even less when you are zoomed in (remember I said that your kit lens probably doesn’t go any wider than 3.5, well if you zoom in to its longest focal length that number will probably change to 5.6!) They make lenses that zoom and have wide apertures but those are usually very expensive AND very big, bulky and heavy. Take Canon’s f2.8 24-70 lens. That bad boy is over $1000! It is easier to make lenses with wider apertures that are fixed or prime lenses, so you can usually find those with much more reasonable price tags. The trick is you might end up needing a whole camera bag full of lenses to add up to one zoom lens and there went your savings.

So which is the “right way” to shoot? Zoom or prime? It’s one of the most commonly debated topics in photography and you will find people on either side fiercely defending their position. But which do I use? Primes if you must know. One of the little “bonuses” of prime lenses is that they often give you just a little bit more sharpness and open up just a little wider than your zoom lens. I also prefer to “zoom with my feet” moving closer and further from my subject to get the look that I want.

One of the common misconceptions among new photographers about zoom lenses is that the point of them is that you don’t have to get closer to your subject to make it bigger in the frame. What these new photographers are failing to realize is that the focal length has a HUGE impact on the look of your image. To help illustrate this point here are 3 images of my son. All taken with his head filling approximately the same proportion of the image.

The first image was shot with a 24mm lens. See how animated it is? The wide angle shows tons of the background plus makes the play mat look fun and exciting and very 3 dimensional. I love photographing babies with wide angle lenses because of the sense of whimsy they lend to the shots.

photography lessons on Permanent Riot by Katy Regnier photography

Next up is the 50mm lens. I was further from the subject (to get him to fill the same amount of the frame) and you can see that the image has started to flatten out a bit.

photography lessons on Permanent Riot by Katy Regnier photography

Here it is again, this time with an 85mm lens. Telephoto lenses compress space, making everything appear closer together and flatter. See how much closer he appears to the china cabinet in the background compared to the first shot?

photography lessons on Permanent Riot by Katy Regnier photography

Just to give you an idea of the change in distance between me and my son during this series, here is the 24mm lens again at the same distance as the 85mm shot.

photography lessons on Permanent Riot by Katy Regnier photography

Each of these lenses has their place. You obviously couldn’t get close up shots of your kid’s soccer game with a wide angle lens, and you probably wouldn’t want to photograph your mother with one at a close range either (wide angles tend to exaggerate features, making people look “cartoonish”). There is no catch-all one perfect lens. It’s important to realize the difference that the focal length is going to have on your final image. If you are using a zoom lens it’s easy to fall into the trap of using your zoom to determine how much of the frame the subject is going to fill. I could have stood in one spot and taken both of the last two shots without even switching my lens. But what I would have missed by doing so is the fun and whimsical nature of the first shot, something I could only achieve by moving MYSELF closer and not by zooming. Take a second to play with your lenses (whether they be zoom or prime) and really notice the effect that a different lens has on the mood of your images. Only once you’ve really started to notice those differences can you start to decide which ones best fit your style.

Zoom or Prime – an intro to focal length (and why you should care about it)

More on aperture (your new best friend)

Hopefully you already read the last post (how your camera works) and saw the very very brief introduction to aperture (aka f-stops). This is going to be one of the most important pieces in the puzzle for you to learn how to take pictures that look “professional” so I thought it would be good to start here. I always think it’s best to learn about one feature of your camera or aspect of photography at a time so that you can really get a hang of it before you move on. Once you nail this one you’ll be well on your way to taking much better pictures so get ready to impress yourself with your mad photo skills 🙂

I’m sure you’ve all seen a picture where the subject (let’s just say it’s a baby because as a mom I’d say 90% of my pictures are probably of my babies) is in focus. You can very clearly see the little eyes and mouth peering out at you from the image, but the background is out of focus. That’s the result of something called depth of field, and depth of field is a result of a few things but mainly the distance you are from your subject and your aperture. If more of the image is out of focus we say it has a shallower depth of field. More in focus it’s got a longer depth of field.

I already mentioned that the depth of field has to do with your aperture and that the smaller the number (which if you remember means BIGGER opening and more light coming in) the more potential there is for the background of your image to be out of focus, which is what a lot of you are probably going for.  Lucky for us this actually works to our advantage. Generally we want to have a fast shutter speed (to keep those little hands and feet in focus and not turn them into a blurry mess) and a wider aperture will not only let us get that “out of focus background” effect we want (which by the way photographers refer to as “bokeh”) but it will also allow us to crank up our shutter speed a little and have a better chance of stopping the motion of our little ones. The other main factor is how far you are from your subject, and how far that subject is from the background you want to be out of focus. generally speaking you want to be closer to your subject than your subject is to the background in order to get the greatest amount of blur. If you are shooting a baby on a couch for instance, chances are the back of the couch is still going to be in focus when you take your picture UNLESS YOU ARE VERY VERY CLOSE TO THE BABY. If your lens is closer to the baby than the baby is to the back of the couch, bingo. Out of focus background. The smaller your f-stop the more blur, and the more you’ll get that fabulous bokeh.

Let’s just take a look at a few photos to illustrate the point. Both of these were shot with a 50mm lens. Both at f 2.8 and 1/50th of a second. In the first one I’m much further than from the baby than she is from the back of the couch and you can see the texture of the couch.

In the second shot I moved closer (this is not a feature of zooming or cropping, I actually moved myself) and now not only is the back of the couch out of focus but so is a little bit of the blanket in the foreground. Same settings, totally different effect.

Want to learn to use your aperture settings to get exactly the look you’re going for? Try setting your camera to the AV mode (aperture priority) and changing your f-stop to see what difference it has on your pictures. Then try moving closer to and further from your subject and see what that does. After playing with it for a while I’m sure you’ll start to be able to visualize what the effect will be before you even snap the shutter. One last word of warning. When you first start playing with wider apertures you may be frustrated by more “out of focus” shots. This is because when using a shallow depth of field it’s absolutely critical that you have your focus locked in on your subject. When shooting people I always suggest focusing on the eyes. If the eyes are in focus your mind will perceive everything else to be in focus as well, even if it’s not. It’s a neat trick 🙂

More on aperture (your new best friend)

How your camera works…

Ok so you’ve agonized over the decision, read reviews, questioned your friends and family and you finally went out and bought that dream SLR you’ve had your eyes on.  You rip open the box, pick it up, and you realize you have no idea how it works.  Yes, if you push the shutter button (provided it’s got a battery and memory card in it) it will probably take a picture.  But do you have any idea how that picture is going to come out?  How can you make that picture look like the one that you meant for this new and fancy camera to take?

Your camera can’t read your mind.  It doesn’t know what kind of picture you want to take.  So chances are it’s going to play it safe.  It’s going to try to get all of the picture in focus (so that your subject is in focus) and it’s going to shoot for an even and predictable exposure (because that’s what its little camera computer brain is programmed to do).  In order to take the kind of picture that YOU want to take (and not the one your camera wants to take) you’re going to have to learn a little bit about how your camera and photography in general work.  I know it sounds daunting but it’s really not that bad and we’ll take it slowly.  Promise 🙂

First things first, exposure.  Exposure is the result of three elements all working together: shutter speed, aperture, and iso.  I’m going to explain them all very briefly and we’ll come back to each one later in a separate post (because goodness knows that all there is to learn about exposure could fill a book… or several… and does)

First up is shutter speed.  This is the one you are most likely to already know a little something about.  Shutter speed is simple.  It is the length of time that your camera’s shutter is open for when you’re taking the picture.  Take a picture at a fast shutter speed and it will “freeze” the action.  Take a picture at a slow shutter speed and chances are it will be blurry.  A quick and dirty rule of thumb is that if you are trying to take a picture handheld (aka you’re not using a tripod) the ABSOLUTE slowest shutter speed you should ever use is 1/the focal length of your lens.  I know we haven’t gotten to focal length yet but say you’re using a 50mm lens.  You couldn’t take a steady picture slower than at 1/50th of a second.  I promise we’ll get into it more later but for now just stay above 1/60th an everything will be groovy 🙂

Next up is aperture.  This one is a little trickier but you probably know more about it than you think.  When your camera’s shutter opens it doesn’t always open the same amount.  The amount that it opens controls the amount of light that comes into the camera at one time, so the bigger the opening the more light, smaller opening less light.  The increments of aperture are f-stops.  It would be nice if the bigger the f-stop number the more light but it’s actually the opposite.  Bigger number = smaller opening = less light.  Lenses that open wide (less than f 2.0) cost more and are generally pretty desirable pieces of equipment.  Your”kit lens” that came with your camera probably doesn’t open any wider than f 3.5 which is why I always recommend getting another lens with a wider aperture.  Canon makes a great “thrifty fifty” 50mm lens that goes to f 1.8, but equipment suggestions are for another day 🙂  There’s one more catch about aperture that I haven’t mentioned yet and that is what the change in aperture does to the picture besides controlling the amount of light.  Aperture is one of the major contributors to something called “depth of field” which is (to put it very simply) the range of distance in front and behind your subject that is in focus.  The wider your lens is open the more opportunity there is for the background and foreground of your shot to be out of focus.  This isn’t a bad thing.  This is how photographers get that great separation between their background and subject and make everything else look “fuzzy”.  It’s something that takes practice to control (and needs way more explanation than I’m giving right now) but for the moment just keep in mind that it’s one more variable when to consider when choosing the perfect exposure.

Last but not least is ISO.  On your digital camera this variable may be controlled way down in the depths of your menu.. somewhere you’d never look… or it may be easy to get to.  It depends on your specific model.  Check with your manual if you’re not sure.  ISO is the digital equivalent of film speed from the olden days.  You used to have to choose how fast your film was and shoot an entire roll of the same speed.  Lucky us digital shooters we can change our ISO every shot if we want.  The ISO controls how sensitive your camera is to light.  The higher the ISO number the more sensitive it will be, so a picture shot outside may be shot at ISO 100, but once you go inside you may need to bump it up to more like 800.  This will allow you to keep your same settings (shutter speed and f-stop) for a shot without it being much to dim due to the reduced light situation indoors.  This is one setting you most likely cannot change while in “green square” auto mode on your camera.  But we don’t want you using that anyways 🙂

Ok are you worn out yet?  I’m worn out just from typing so I can’t imagine how you must be feeling after reading all this.  My suggestion is to just try to master one of these variables at a time by playing with your camera’s AV and TV settings.  AV is “aperture value” and allows you to choose your aperture while the camera will pick the right shutter speed for a good exposure.  TV is “time value” and will allow you to choose your shutter speed while the camera chooses an appropriate aperture.  Both are great tools for the beginning photographer while you learn how to set exposure.  Once you’re good and practiced with these settings we’ll get into a little bit more detail about each of the variables and how you can use them to your advantage.

And just because I hate to have you read all of this text without at least one photo, here’s a favorite of my little ones.  I’m going to try to put up new photos with each post and give you some the exposure info so you can get an idea of how each of them was shot.  This was at 1/125th, f 2.8, ISO 1600 in natural light:
photography lessons on Permanent Riot by Katy Regnier photography

How your camera works…