Light makes photography. Embrace light. Admire it. Love it. But above all, know light. Know it for all you are worth, and you will know the key to photography. –George Eastman
Learning photography is a tricky business – starting out it’s easy to believe that there are just a few simple rules to master to become an expert. In truth, the more that you learn the more that you realize that you’ve barely scratched the surface of what there was to learn. Such is the case with learning about light. I used to think that there were a few simple rules of thumb to using light in photography. I thought that with practice I would learn them all. And I have learned a trick or two in the last few years, but what I’ve learned more than anything is that light isn’t just a component of photography, light IS photography. Light lends the mood to an image, bends around objects and shows us the forms of our subjects. Light creates reflections and casts shadows. Light can be warm or cool, artificial or natural – but it always, always deserves consideration when shooting. I sat down to start a post about light and realized that it is impossible to sum up everything I want to say in one post, so instead I’m going to start a series. And what better way to start a series on light than to tell you about the first moment that I noticed the light around me as a photographer. It’s called the “magic hour” – some people call it the golden hour. It’s commonly defined as the last hour before sunset and I’m going to tell you a few things about shooting at this time of day.
Back in 2007 (before kids, can you imagine?!) my family and I were on a trip to Normandy and I was toting my camera everywhere with me. We were on a tour of historic WWII sites and happened to be at one of the old bunkers right around sunset. I was walking around snapping away when all of the sudden something MAGICAL started happening. The whole sky started to get a glow – a golden, shimmery, amazing, dreamy, buttery (there really aren’t enough adjectives to describe it) GLOW. The quality of light was so amazing that it literally felt like something you could reach out and touch. As I stood there, awestruck, it seemed that I couldn’t possibly take enough pictures to capture the feeling of being in that moment, bathed in that glow. The light was imparting an aura and emotion onto everything that it touched and it was literally begging me to push the shutter button (again, and again, and again). Still when I look at these images I can FEEL what it was like to stand in that light. It was the magic hour at its very best.


 At this point in time I was what I would describe as an aspiring professional. I had set up a website to showcase my work, I was begging all friends and family to let me practice on them, and I was starting to shoot a few weddings. I had heard photographers talking about how light was important in photography and I knew the term magic hour, but I hadn’t ever really experienced it for myself. After seeing and feeling that light in Normandy I all of the sudden knew that light was way more important than I had ever imagined. I could feel its power and knew that learning to find it would make me a better photographer, but I didn’t know where to start.
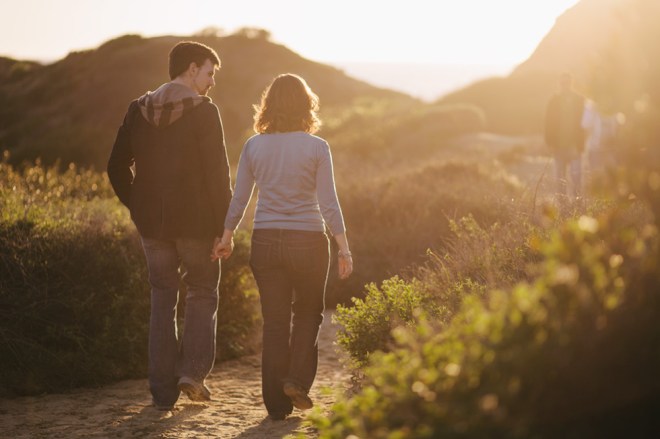
I was told by more experienced photographers that the best way to capture the magic hour was to shoot during the last hour before sunset. In that hour you will find a magical, mystical warm glow. Or so I was told. So I scheduled an engagement session and pumped myself up. Let’s get ready for some MAGIC! And yet… what I got was this.
 Squinting? Harsh shadows? Raccoon eyes? This is not what I had in mind. The entire first half hour (maybe longer?) of our session looks like this. I’ll spare you the photos, they kind of make me cringe. At this point I was having a bit of an internal panic. What is going on?! I thought it was supposed to be the magic hour?! Why can’t I make any magic?
But then, slowly but surely the sun started to dip lower in the sky and a familiar warmth crept back in.
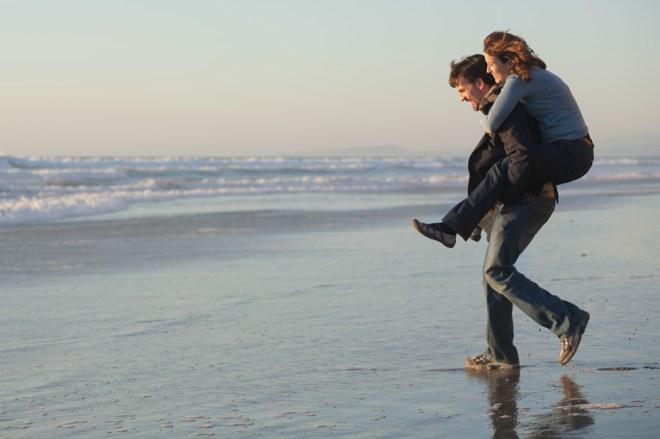
 It turns out we had just started shooting too early, we were in midday harsh light territory and not the magic hour. If we were at a location with open shade this would have been a great place to start the session, but alas we were at the beach. Once the lighting was less harsh and more manageable things started falling into place a bit more. Keep in mind this is still very early in my photography journey, if I were here again there would be a few things I might do differently. Even so, what a difference between these and that first image.
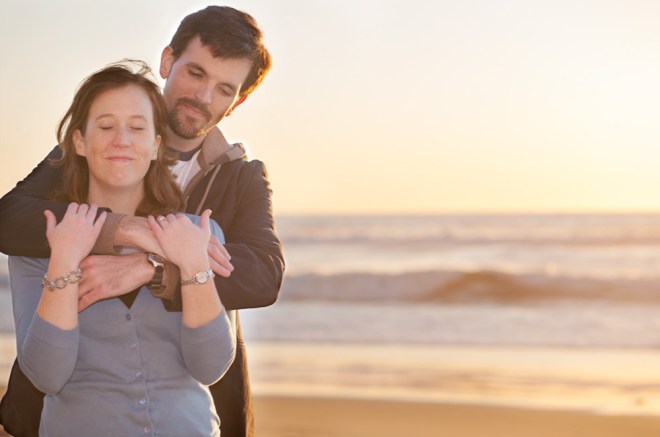 So why had all of those other photographers told me to start shooting the last hour before sunset if that last hour was so harsh? The real “magic hour” in my beach session was only about 5 minutes long immediately before the sun dipped below the horizon and the glow lasted a few minutes after the sun was gone as well. Does that mean you should only schedule shoots right at sunset with a little padding for lateness and “get to know you” time? Well not exactly. Here’s the part that took me a while to figure out. The magic hour really has very little to do with the clock. Light doesn’t care what time it is. Magic hour light comes from the interaction between light and objects. In the case of magic hour at the beach, the object is the horizon. But if you’re in a location with a hill, you’re going to lose light a lot earlier. If you’re in an urban location, the sun dipping below a building can give a magic hour glow. And both of those things are going to happen a lot earlier than if you were waiting for the sun to drop below the absolute horizon.
My yard backs up to a hill. The magic hour in my backyard is at least an hour (more like two depending on the time of year) before sunset. If I wait until the local sunset time to shoot in my yard I will be looking at a big blue blob of shadows. If I shoot at *my* magic hour I get something like this.
 The effect in my yard at the very end of the day is so dramatic because the entire hill is in shadow while the glow creeps into the foreground. It’s an effect that changes by the minute and one that you can miss if you wait too long to shoot it.
Light filtered through trees will give a different look. The leaves appear to glow giving more brightness to the entire image compared to the darkness of the background in the previous image.
 And backlighting at the magic hour with the sun directly behind your subjects will result in an almost all white sky.

 But the amazing thing about light in photography and learning to use it is that the possibilities are endless. The image directly above was shot with the sun behind the subjects and the sky is blown to white, but if you take a few steps to the side and shoot at the very same time of day from a different angle… well there is your sky again.
 The way that you position yourself and the way that you set your camera will make all the difference in the world, and the beautiful thing is that the more you learn to see the way that light interacts with your lens, the more you can control it.
Sunlight hitting your lens directly will cause haze and lower contrast. Get that sun out of the same shot and the haze will disappear. The image on the left has a sliver of sun to the right side of the frame which is causing some haze and sun flare. Just a step to the right for me and a change in angle and the haze and flare are gone. Whether you prefer one or the other is totally up to you. It’s a stylistic choice but the important thing to realize is that it IS a choice. If you know how light works you can use it instead of having it use you.
 I tend to prefer backlit images to ones with front light. Even though the sun being low on the horizon gets rid of harsh under-eye shadows I still prefer the softer look of indirect lighting on faces and the bright airiness that comes with the light sky in a backlit image. If bright blue skies are more your style, don’t be afraid to shoot from an angle that sheds a lot of light on your subjects. The colors right before sunset are bright and vibrant with a delicious golden hue.
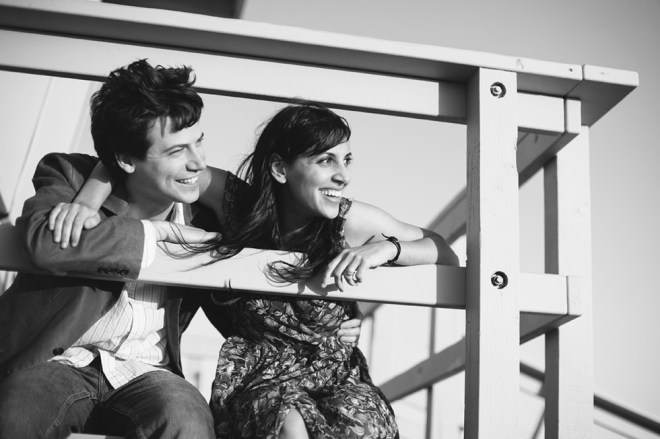
 This kind of shot also translates well into black and white, since the higher level of contrast gives a nice depth of tones that might be absent in a backlit black and white.
If I let myself, I could just go on pulling images for this post indefinitely. Even though it’s one single time of day there are a million ways to use it, and I love the light at this time of day THAT much. But the crazy thing is that I have barely begun the journey in my own learning of what this light can do. I find myself discovering new ways to use it every time I shoot. Even though I have been practicing for years, I am just a novice when it comes to light. I hope that in writing a bit about how light moves and inspires me, that you will find some inspiration for your own journey. I hope that you will look at the world with fresh eyes and a bit of wonder at the amazing beauty that surrounds us, just waiting to be captured.
In the future I hope to share a bit about some of my other favorite types of light (I have a lot of them) and how I use them. In the meantime if you want to read any of my photography lessons you can find them right here. I hope you enjoy!


