 Happy Valentine’s day! I hope your day was full of lots of love and sweet treats!
I don’t know about you but I was never all that into decorating for Valentine’s day or making a production about it before I had kids. I like to tell my husband that I love him every day, not just on designated days where flowers cost twice the usual going rate. All that aside, as soon as kids came into the picture it seems like holidays took on a whole new meaning. I remember waking up as a kid on Valentine’s day and my mom had decorated the whole kitchen and set the table with a red table cloth and a small treat for each of the kids at our seats. Those kinds of overnight transformations were always so magical. Being a kid is awesome – anything can happen while you’re sleeping.
I didn’t have huge plans for Valentine’s day this year but after we got the kids in bed I decided that it might be fun to fill the kitchen floor with red balloons. I really wanted to get heart shaped balloons but I guess maybe I should have thought of it sooner than the day before? I sent Ben out on a mission to buy some balloons and while he was gone I started hanging up some streamers and making more recycled mail decorations to go with the hearts that Amelia and I had made earlier in the week. Then I remembered that I had a bunch of small colored hearts already cut out from several years ago when I took the twins’ first Valentine’s day photo. I started hanging them up in the doorway – and, well, I think you can see where this is going. I got a little carried away. It was totally worth it to see the look on the kids’ faces when they woke up. They loved everything (especially the balloons).
 My very favorite part of all of the decorating we did was the giant “I love you so” scrawled in cursive along the top of one of the walls. It was actually Ben’s idea and I am absolutely sure we will be repeating this concept in the future – it’s so easy! Crepe paper streamers are the perfect medium for this kind of project – they’re stretchy and not likely to break, they keep their shape when they’re creased and are very lightweight so they stay up with just the tiniest bit of tape. I freehanded my letters as I went, but I’m sure you could sketch out your pattern on the wall ahead of time if you’re worried about getting it just so. If you’ve ever used the pen tool in Adobe Illustrator or drawn a spline in a CAD program, this lettering is the same idea. You only need to tack down the letters at “anchor points” where the streamer is curving or changing direction, not along the entire length. I actually used very little tape for this project, considering the final effect. The whole thing probably cost us around fifty cents. (as a nerdy side note, if you have some free time on your hands, check out the shipbuilding origins of the computer spline)
 The day went by in a blur of crafting and chaos (as they tend to do) – and we even managed to make some cards for the kids to take to the “friendship party” that they had at preschool this morning. I really wanted them to be a part of making the valentines so I asked them to paint with watercolors on sheets of white paper. After the paint was all dried they cut out circles from their drawings with my hole punch and wrote their names on the back. By the time they finished writing their names on every paper they were pretty burnt out of crafting so I finished them up on my own – but it would be pretty impressive if they could write in cursive, wouldn’t it?
 Overall I’d say the day was a smashing success. Once the kids were in bed, Ben and I cooked up some amazing mini chocolate souffles (I had no idea they were so easy to make – I’ll be making them again soon for sure!) and watched a terrible cheesy romantic comedy. I hope your Valentine’s day was just as much fun!
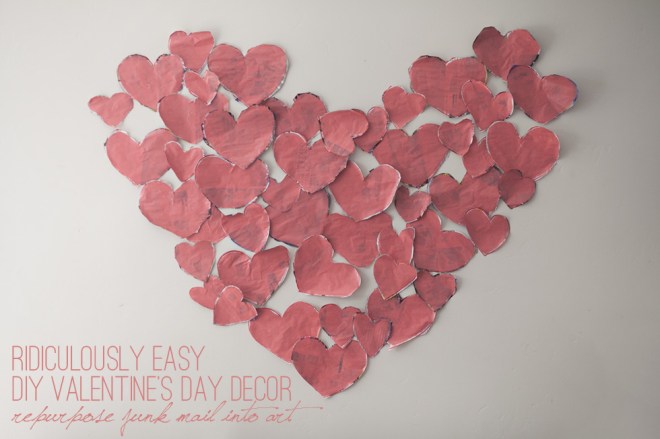 I don’t know about you but I can’t stand junk mail. CAN’T STAND IT. I have signed up on a few lists and websites that promise to cut down on the amount of trash mailing you’ll recieve but so far I haven’t noticed any difference. It breaks my heart to go to the mailbox and pull out a mountain of paper, only to dump 90% of it directly into the recycling bin. Sure, recycling is better than trashing, but in the old “reduce, reuse, recycle” slogan, recycle is a last resort if you can’t reduce or reuse. Lately I’ve been making it my mission to reuse things that come into our house before I throw them out, and this morning I had an idea for what to do with just a small handfull of that dreaded junk mail.
 My kids loved doing this project with me and they also loved the final effect. The kept saying that the hearts looked like birds flying off the wall, which is quite lovely, don’t you agree? I used these hearts for a backdrop for the kids’ valentine photo but that’s going to stay under wraps for just a few more days – you’ll see it on Thursday, promise!


