
Waffles in the making… a recipe is coming soon!
Waffles in the making… a recipe is coming soon!


Of all the little nooks and crannies of our house I still think the bookshelf is my favorite, I could sit and look at it for hours
One of the questions that I get asked most often is “what kind of camera should I buy?” It’s a question that makes me a bit uneasy because I believe that equipment purchases are highly personal decisions. I would hate to be responsible for someone else’s buyer’s remorse. I also know that people tend to think that they need the latest and greatest camera, when I would often urge them to go with something less expensive. It’s not that I don’t think that you deserve the best camera that money can buy (or that you can afford) – it’s just that I don’t think you *need* it.
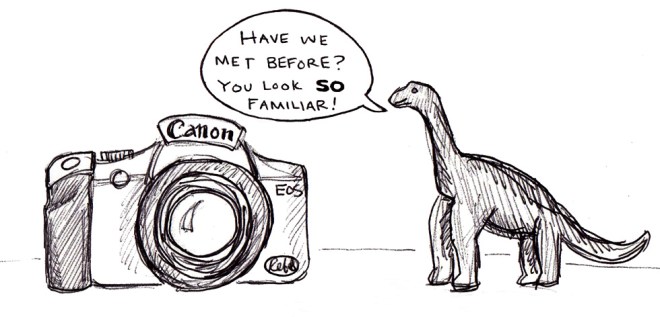
My first introduction to photography was in high school and my camera at the time was a Canon A-1 (a film camera from the 80’s and close relative of the AE-1 which, by the way, had hilarious TV commercials which you can still see on youtube). It was by no means the latest and greatest camera but it did everything that I needed it to do. Fast forward to 2006 when I decided to learn digital photography. The camera I started out with was a Canon EOS 300D – aka the digital rebel – a camera made in 2003 which was the very first consumer DSLR on the market for under $1000 – this sucker was made almost entirely of plastic and rung in at $999 with a kit lens. I got mine as a hand-me-down from my dad who is always up on the latest in technology and had upgraded to a newer model. The original rebel now is practically a dinosaur. Compared to the newer versions of the digital rebel – even the very base level that Canon still lists on their site (the T3) the one that I was using had half the megapixels (6.5 vs. 12.2) and several stops less of ISO capability (1600 vs. 6400) not to mention all of the advancements in autofocus and sensor cleaning and all that jazz.
The thing is, none of that really mattered at all. It still had all of the basic functions that you need to learn photography – the ability to control aperture, shutter speed and ISO, and the ability to select your focus points. I ran my poor little rebel into the ground before finally upgrading to a 30D (also now a bit of a dinosaur) when I started shooting weddings. Eventually I upgraded again to a full frame 5D and most recently to the 5D Mark II. It’s easy to see a new camera come out and start to feel the itch – maybe I need it… maybe it would make me better… maybe it would make my pictures better. But the truth is that great imagery relies so much more on the photographer than the equipment. It’s not what you’ve got but how you use it.
Don’t believe me? I thought you might not so I did a little experiment and pulled out my old gear to shoot around the house this morning.
All of the images below were taken with available light using only my Canon EOS 300D and a 50mm 1.4 lens. I really wanted to take them with a 50mm 1.8 because that was my original prime, but sadly I have no idea where that lens is. I have a vague recollection of maybe lending it to a friend years ago, but I’m not sure where it ended up. Since I want to stay true to the message (it’s not the equipment, it’s the photographer) I took all of these images at f1.8 or higher. That means that you too – with even the most rudimentary of equipment – can learn to take photos like this WITHOUT spending a fortune on equipment. A used rebel just like the one I was using is currently going for around $80 on Amazon.


So instead of focusing on what our cameras can’t do, let’s start focusing on what they can – and what they can do is give us the means to take beautiful photos of our lives and the ones we love. From the most basic entry level camera to the top of the line pro model, they all have one important feature in common. They are all operated by living, breathing human beings who bring their own visions of the world to the images they capture. What beautiful image will you capture today?
This post is the newest in a series of online photography lessons that I have written – most of them are several years old but I’m hoping to revive the series and start writing them more regularly again. To learn more about your camera and how it works check out more of the lessons right here.


We were a little bit worried that the apple tree in our backyard had died over the winter (I have the world’s blackest thumb) but it turns out it’s alive and well. Hooray for apples!


Happy half birthday to my beautiful girl!
Have you joined instagram yet? I’m such an addict, I just love being able to document everyday life with my phone and share it with friends and family in a blink. I still love my “real” cameras too, but instagram is such a different animal all together, and one I can’t seem to leave home without bringing along.
I absolutely love taking pictures of the sky, but was feeling a bit silly posting them all the time to instagram without a good reason (does anyone ever really need a good reason to instagram?) So at the beginning of the year I decided to dedicate a project 365 (one photo a day for a year) to the sky. That way I get to take and post a sky photo every day guilt-free. Because it can’t be insta-spam if it’s for a project 365, right?
Here is the first month, all wrapped up in a pretty little collage. I can’t wait to have the whole year in one place, it’s going to be so cool!

Valentine’s day is just around the corner (how is it February already?!) and I love a good reason to make something new and crafty. I have been looking for an excuse to try out making scratch-off paint ever since I read a tutorial on DIY scratch-off cards last year, and valentines seemed like a perfect match. Who doesn’t like a little surprise in their valentine??
Being on a bit of a drawing and hand-lettering kick I decided to draw something out rather than design on the computer. I always feel so much more free with a piece of paper and pen in front of me, don’t you? I had the idea for the sheep first but once I started I just couldn’t stop coming up with new phrase and animal combos. I’m a sucker for a good pun. Once I had all of my ideas sketched out, into the computer they went to get cleaned up and neatly arranged, all ready to be printed out on cardstock and turned into your super awesome valentines. If you love them and want to make a few (or a hundred) for yourself, just go download the PDF file, then follow along with this easy tutorial and you’ll be sending out scratchable love notes in no time!
First up – what you’ll need:

Once you’ve printed out the PDF onto a sheet of cardstock and assembled all of your supplies, start by cutting a small square of contact paper and tracing the hearts onto the contact paper. Make sure to trace onto the shiny surface on the front and NOT onto the paper on the back. The pen may bubble up a bit, but that’s ok, because you will want to cut to the inside of your line anyway. Since the hearts are all hand-drawn they aren’t entirely symmetrical and tracing on the paper side of the contact paper would produce a mirror image, which we don’t want. Once your hearts are traced and cut, peel off the paper backing and smooth them down onto the cards. I like to use the back of a pair of scissors to make sure that all the bumps and bubbles are out.

After all the hearts are prepared it’s time to mix the paint. This is not an exact science but you want to use about two parts paint to one part dish soap – I used one part red, one part white paint to make a bright pink. When applying the paint to the hearts I like to go a bit outside the contact paper and onto the cardstock. That way if your recipient gets carried away with the scratching you know there will still be an outline of the heart left around the edge that they won’t be able to take off. It’s best to apply the paint in thin, even layers. You’ll probably need a few coats (between three and four depending on what color you use), so make sure to let them dry thoroughly before moving on to the next

Once the first coat is on, go and grab a quick coffee and admire your work so far – looking good isn’t it? Make sure not to move on until the paint is fully dry to the touch or it will take longer for the next coats to dry as well.

Once you’ve finished all the coats of paint and everything is dried, it’s time to cut apart your cards. Scissors will work just fine but I prefer to use an exacto blade and straight edge for an extra clean look.

And that’s it! You’re done! That was easy, wasn’t it? The hardest part is resisting the urge to scratch all of the cards yourself before you hand out your valentines.

If you’re feeling extra crafty you might even whip up a few little envelopes to stash your valentines inside. You could even include a penny and a little hint that the heart is scratchable. So cute!

Happy valentine’s day, and happy crafting!
